> ## Documentation Index
> Fetch the complete documentation index at: https://docs.starsheet.app/llms.txt
> Use this file to discover all available pages before exploring further.
# Automatic Setup
> Setting up a project using Starsheet's Cloudformation to setup resources automatically on AWS
Starsheet provides a template to automatically create the necessary resources on your AWS account in just a few clicks. It uses [Cloudformation](https://aws.amazon.com/cloudformation/), which is an AWS service to create a "stack" of resources based on a template.
If you choose the automated setup, you will be directed to AWS when setting up your project. Once the Cloudformation stack has been deployed on AWS you should return to the setup page to complete setting up your Starsheet project.
## Permissions
Our Cloudformation template grants Starsheet with the minimal set of permissions required to function. Access is limited to only the resources that the Cloudformation template creates, and only the minimal set of permissions required is granted.
The following permissions are granted to **only the specific S3 bucket and Cloudfront distribution** created by the template.
**S3**
| Permission | Why it's needed |
| ----------------- | -------------------------------------------------------------------------------------------------------------------------------------------------------------------------------------- |
| `s3:PutObject` | Used to upload the data generated from your Google Sheet(s) to your S3 bucket |
| `s3:DeleteObject` | Used to delete an item from S3 when you perform an action in Startsheet to initiate a deletion (such as deleting an environment). Starsheet never deletes data unless you initiate it. |
| `s3:PutObjectAcl` | Used to set permissions on an item to make them publicly available or private. |
| `s3:GetObject` | Used to copy a content version to an environment when publishing to an environment |
**Cloudfront**
| Permission | Why it's needed |
| ------------------------------- | ---------------------------------------------------------------------------------------------------------------------------------------------------------------------------------------------------------------------------------------------------- |
| `cloudfront:GetDistribution` | Used by Starsheet to get the Cloudfront Domain Name and any Custom Domain Names mapped to the Cloudfront Distribution, which are used to generate the correct content URLs in the Startsheet application. |
| `cloudfront:CreateInvalidation` | When publishing content to an environment, Starsheet will automatically create an invalidation request to clear Cloudfront's CDN cache of old versions of the content to ensure that new requests return the updated content as quickly as possible. |
You can verify this manually by viewing the [Cloudfront Template](https://starsheet-cloudformation-templates.s3.amazonaws.com/latest.json) file that Starsheet uses.
## Setup Instructions
After selecting your Google Sheet, select 'Automatic AWS Setup' and follow these steps:
This will direct you to AWS. Create a new account if you do not already have one or log in to an existing account.
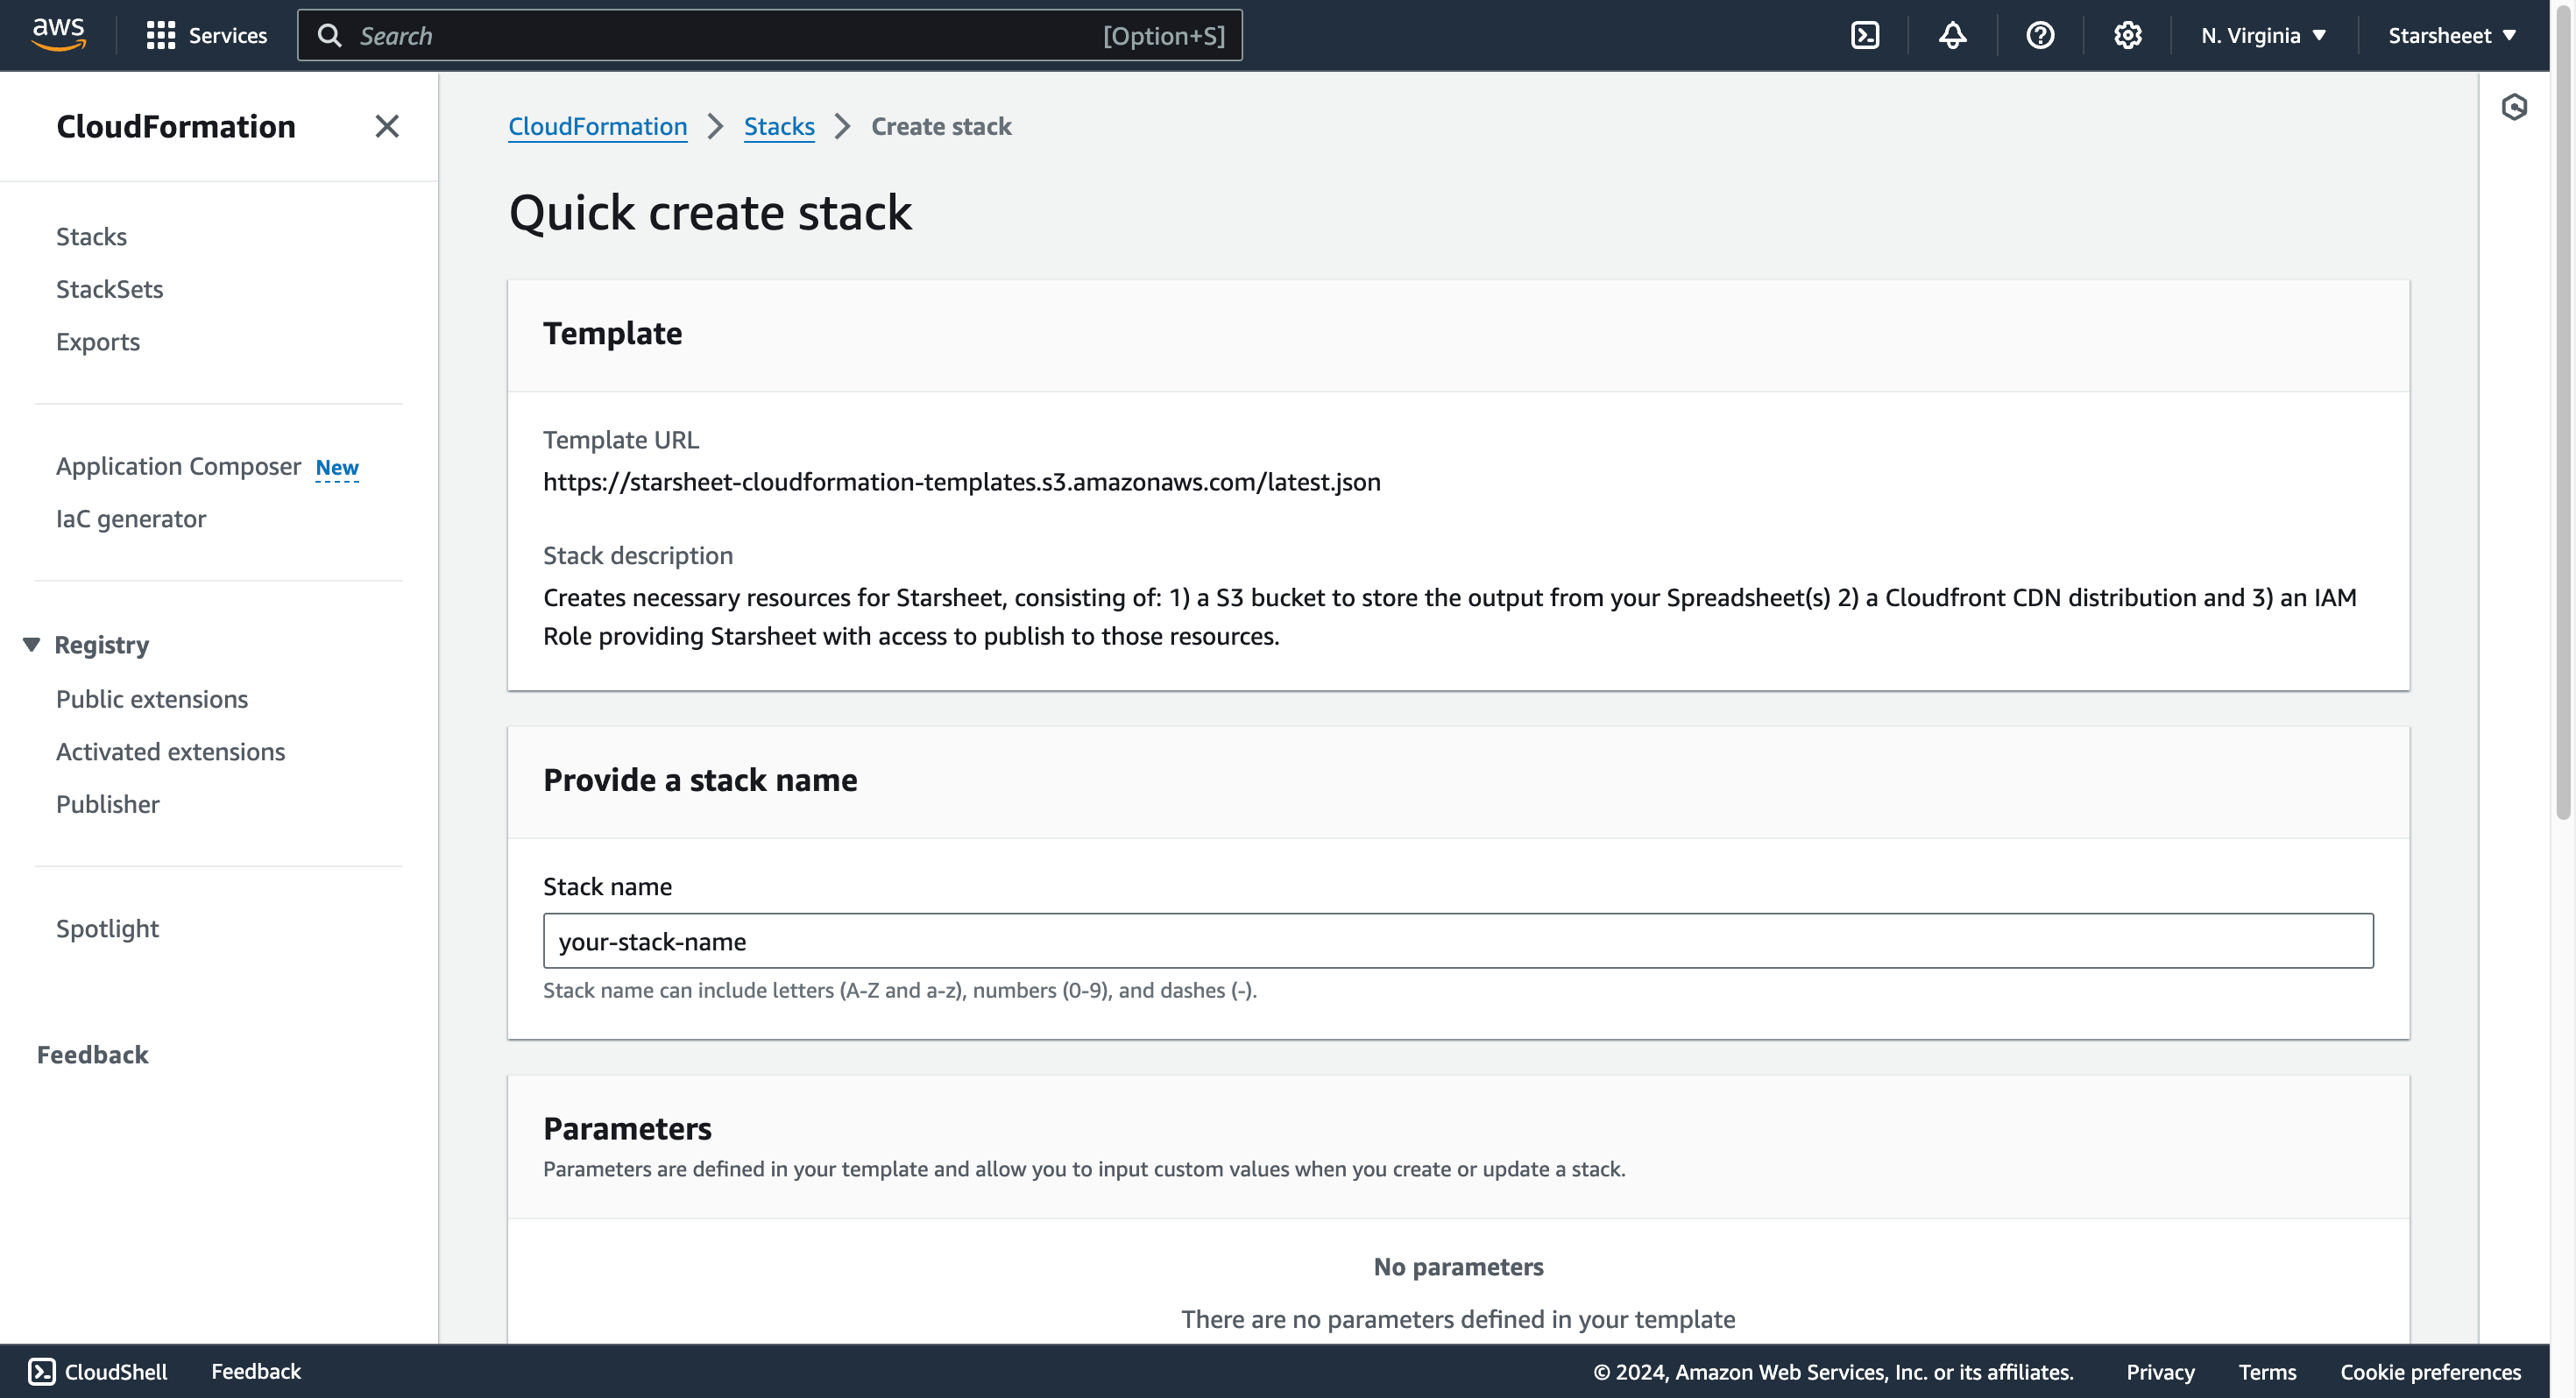
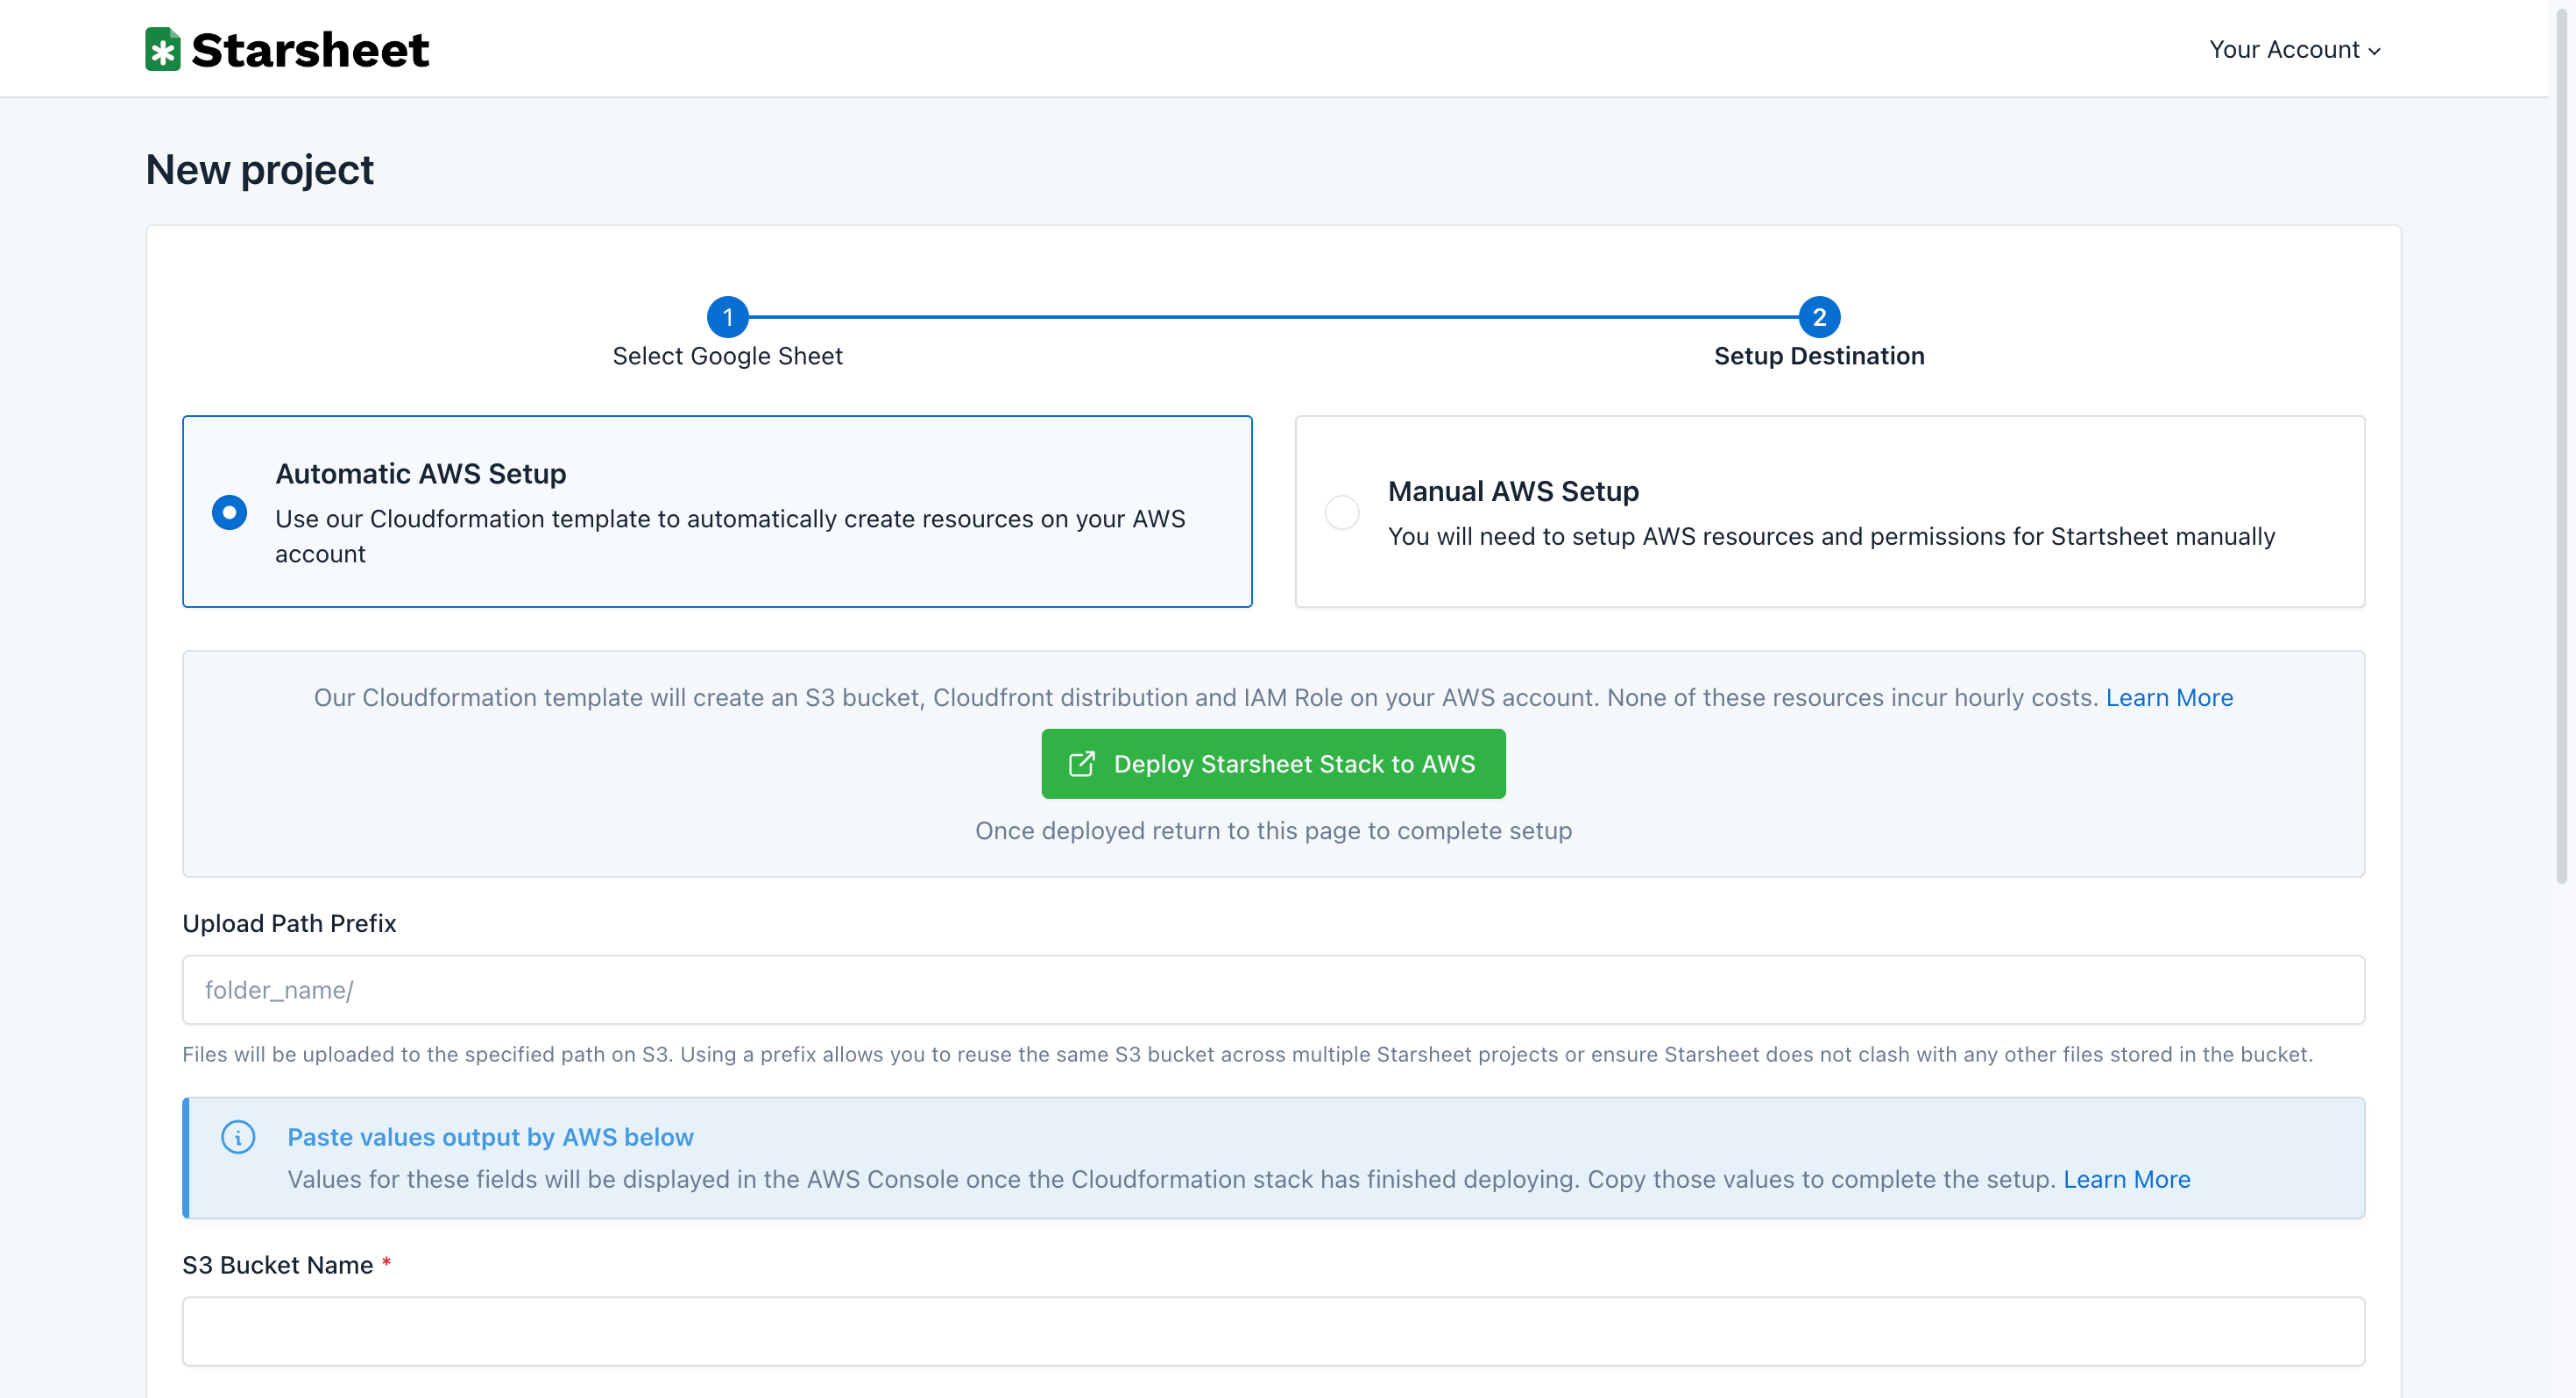 The name will be used in the resource created. For example the S3 bucket created will
use the format `starsheet-{YOUR_STACK_NAME}-{GENERATED_UNIQUE_ID}`.
The generated unique ID is added to prevent clashes because S3 bucket names must be globally unique across all AWS customers.
The name will be used in the resource created. For example the S3 bucket created will
use the format `starsheet-{YOUR_STACK_NAME}-{GENERATED_UNIQUE_ID}`.
The generated unique ID is added to prevent clashes because S3 bucket names must be globally unique across all AWS customers.
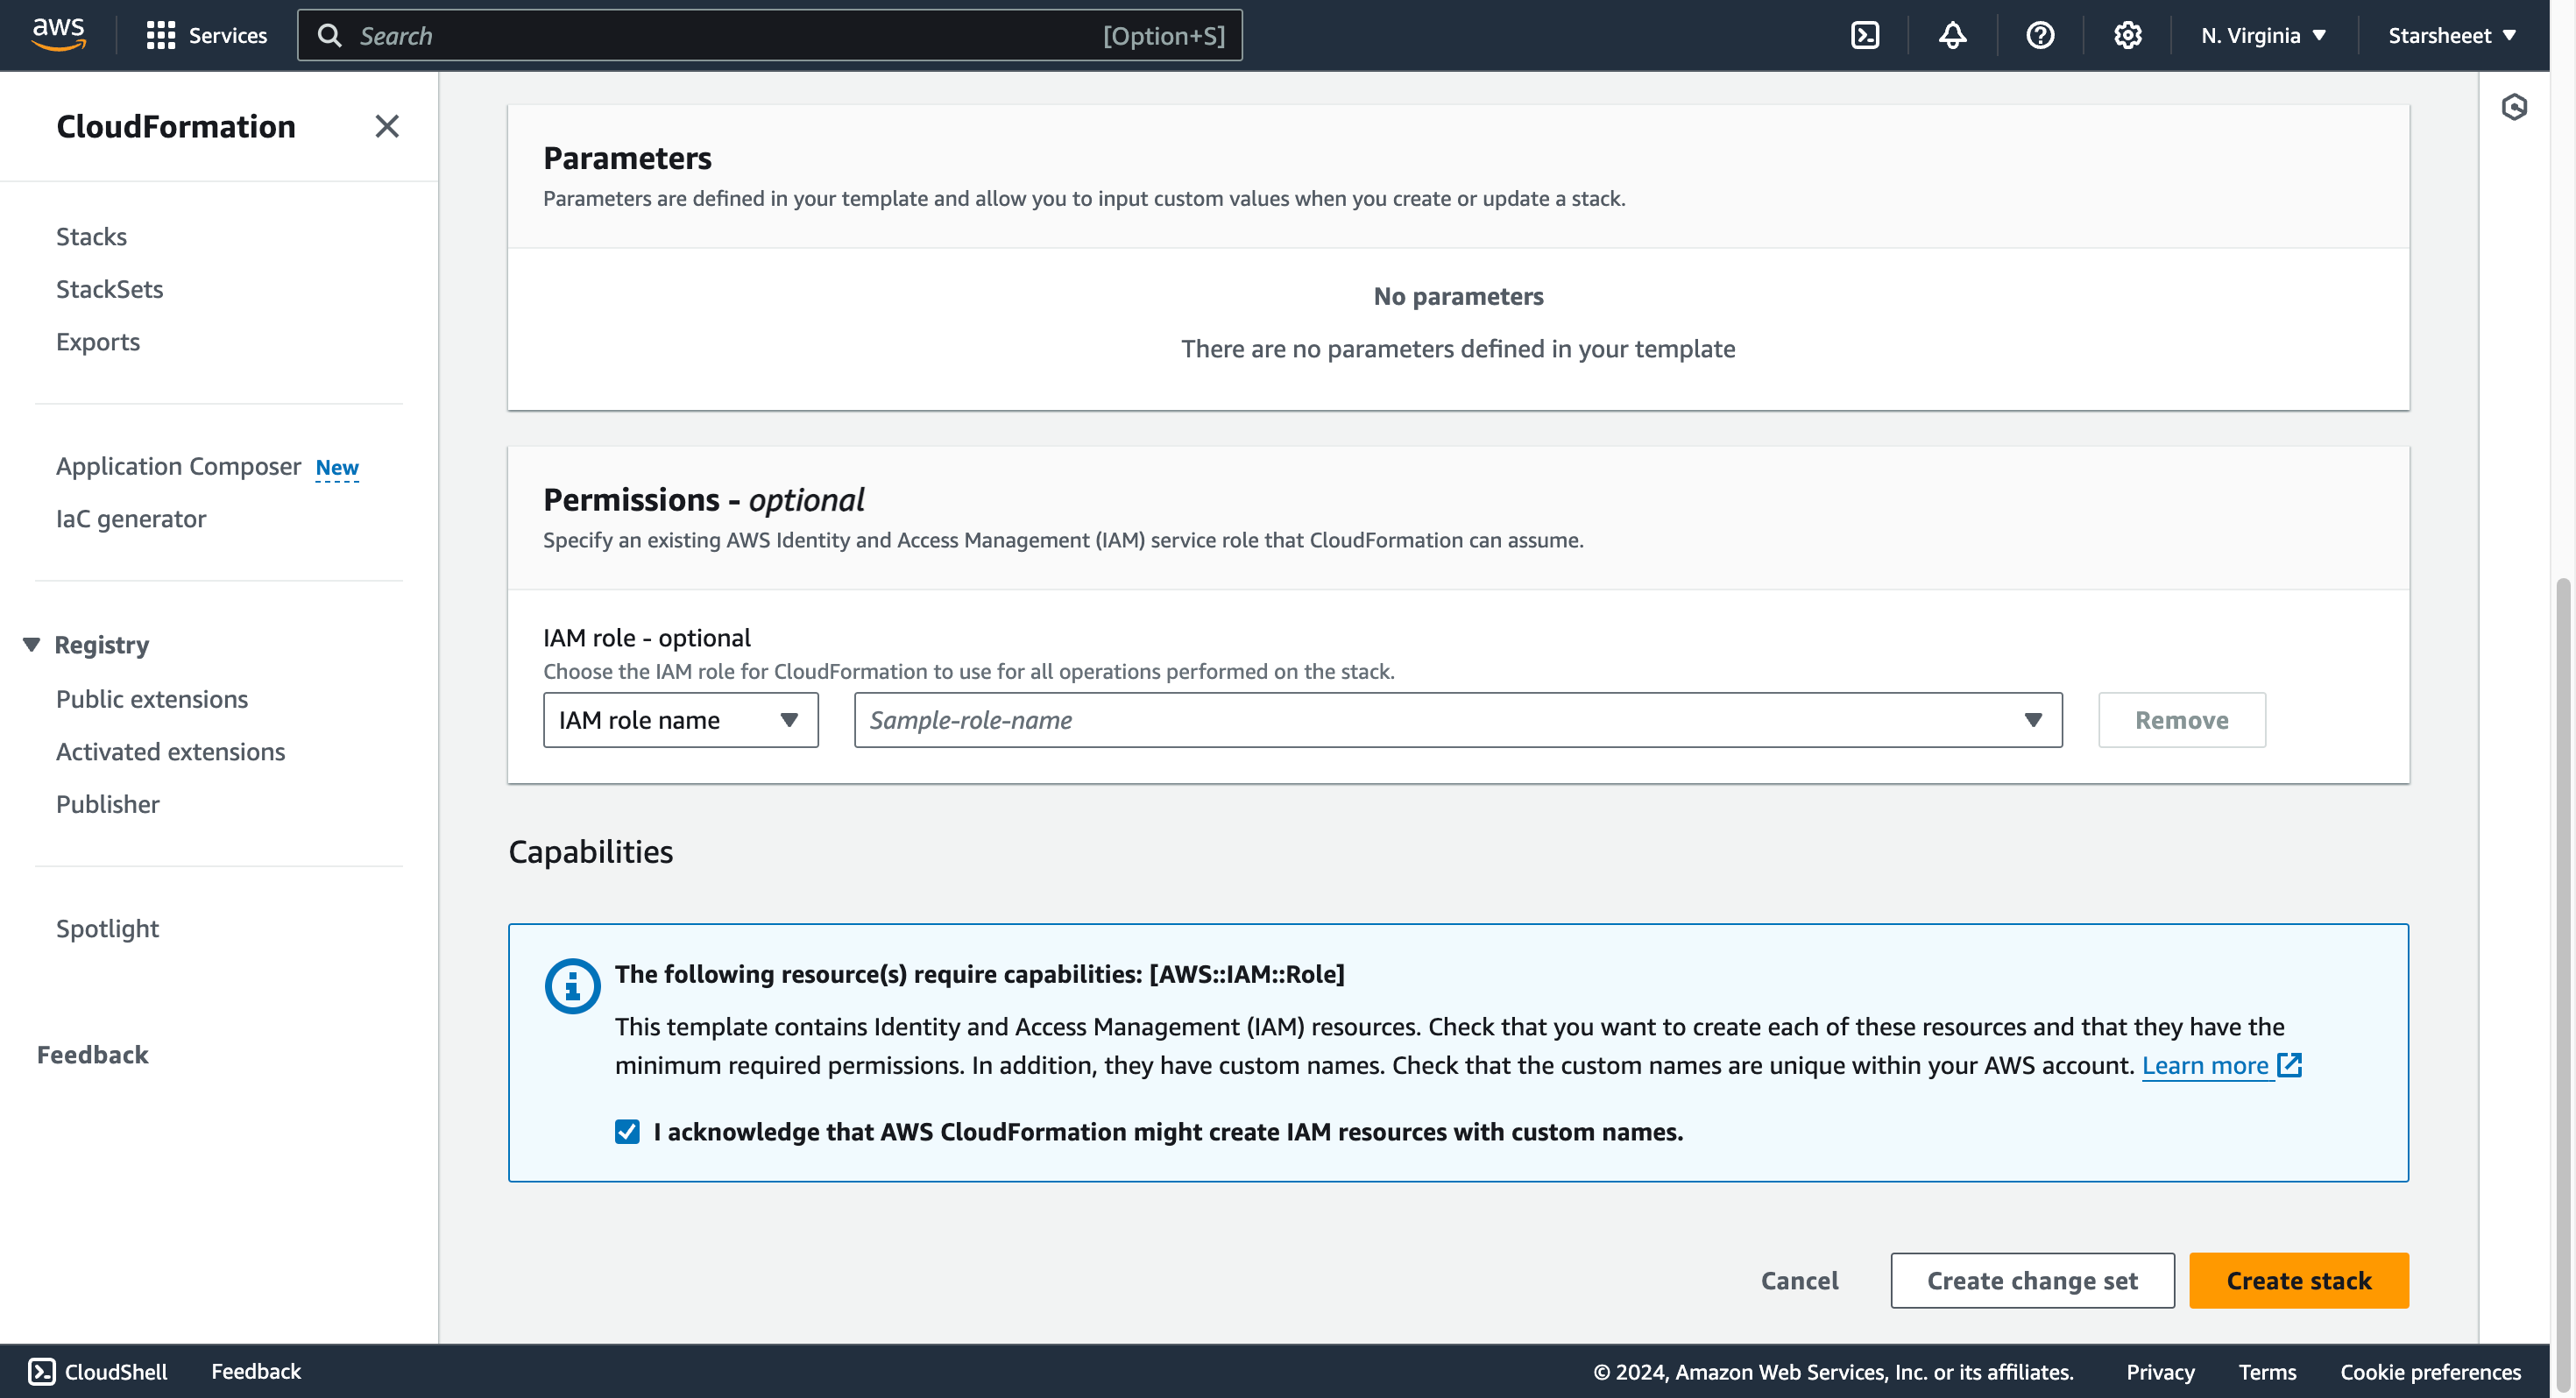
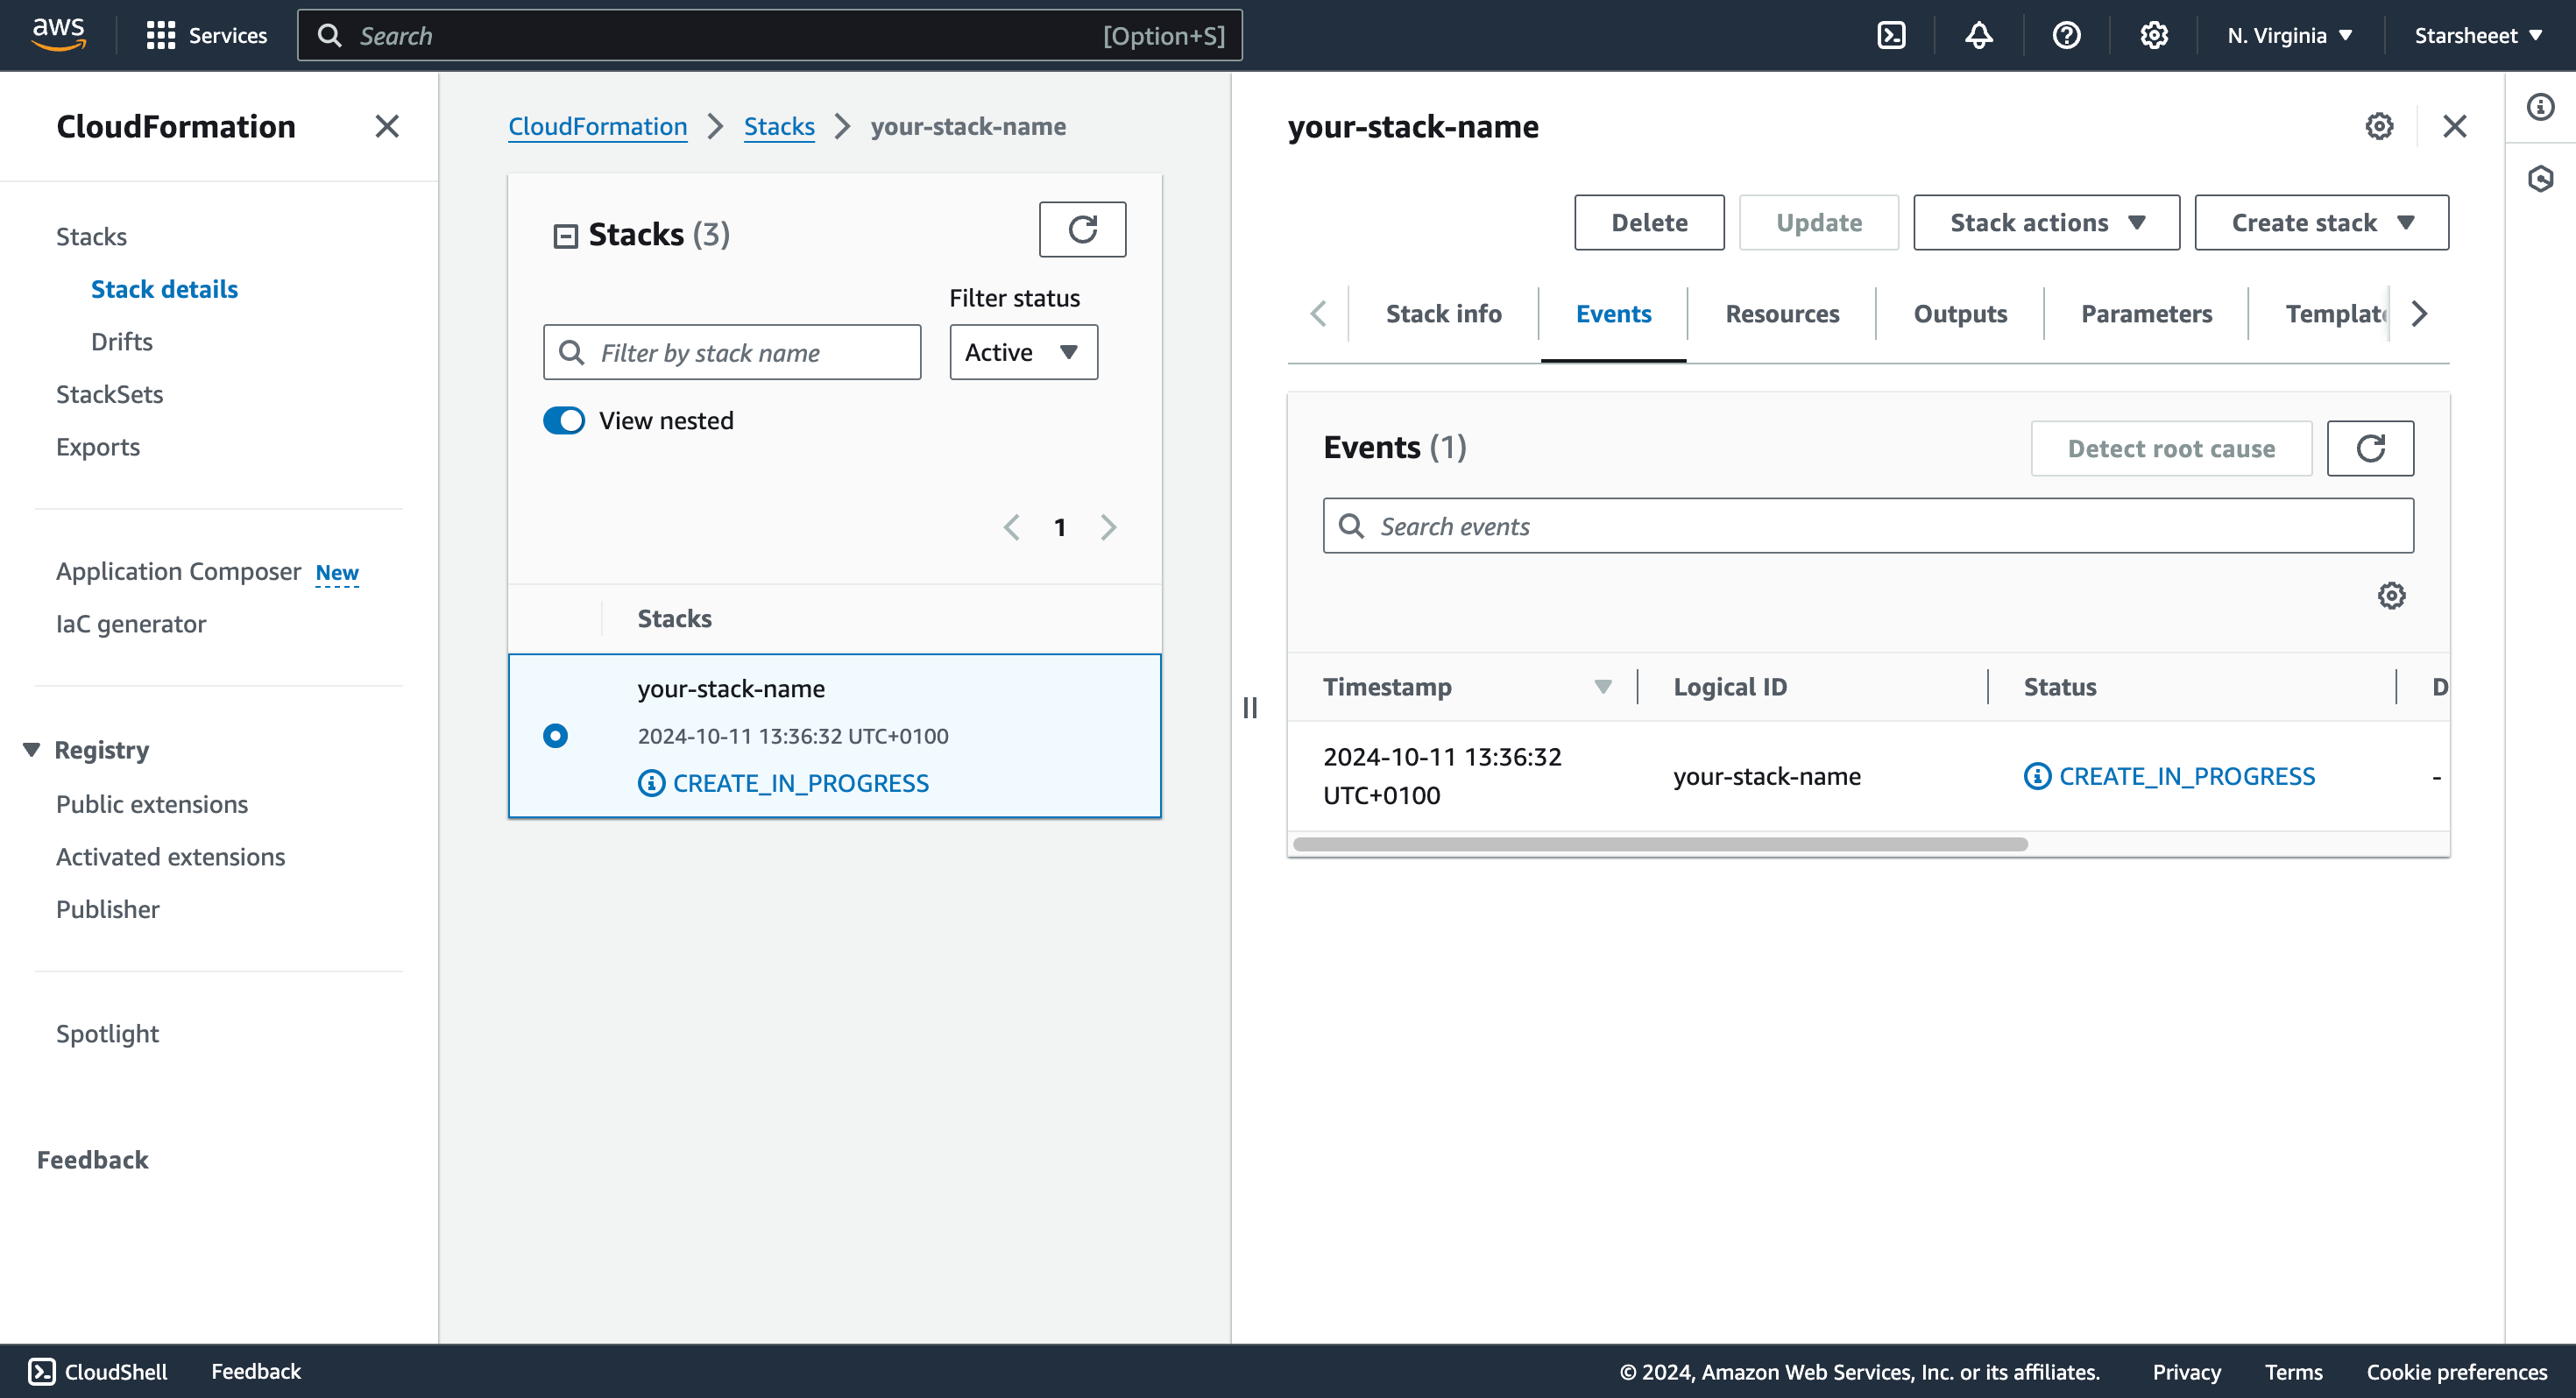 The deployment will take a few minutes to complete.
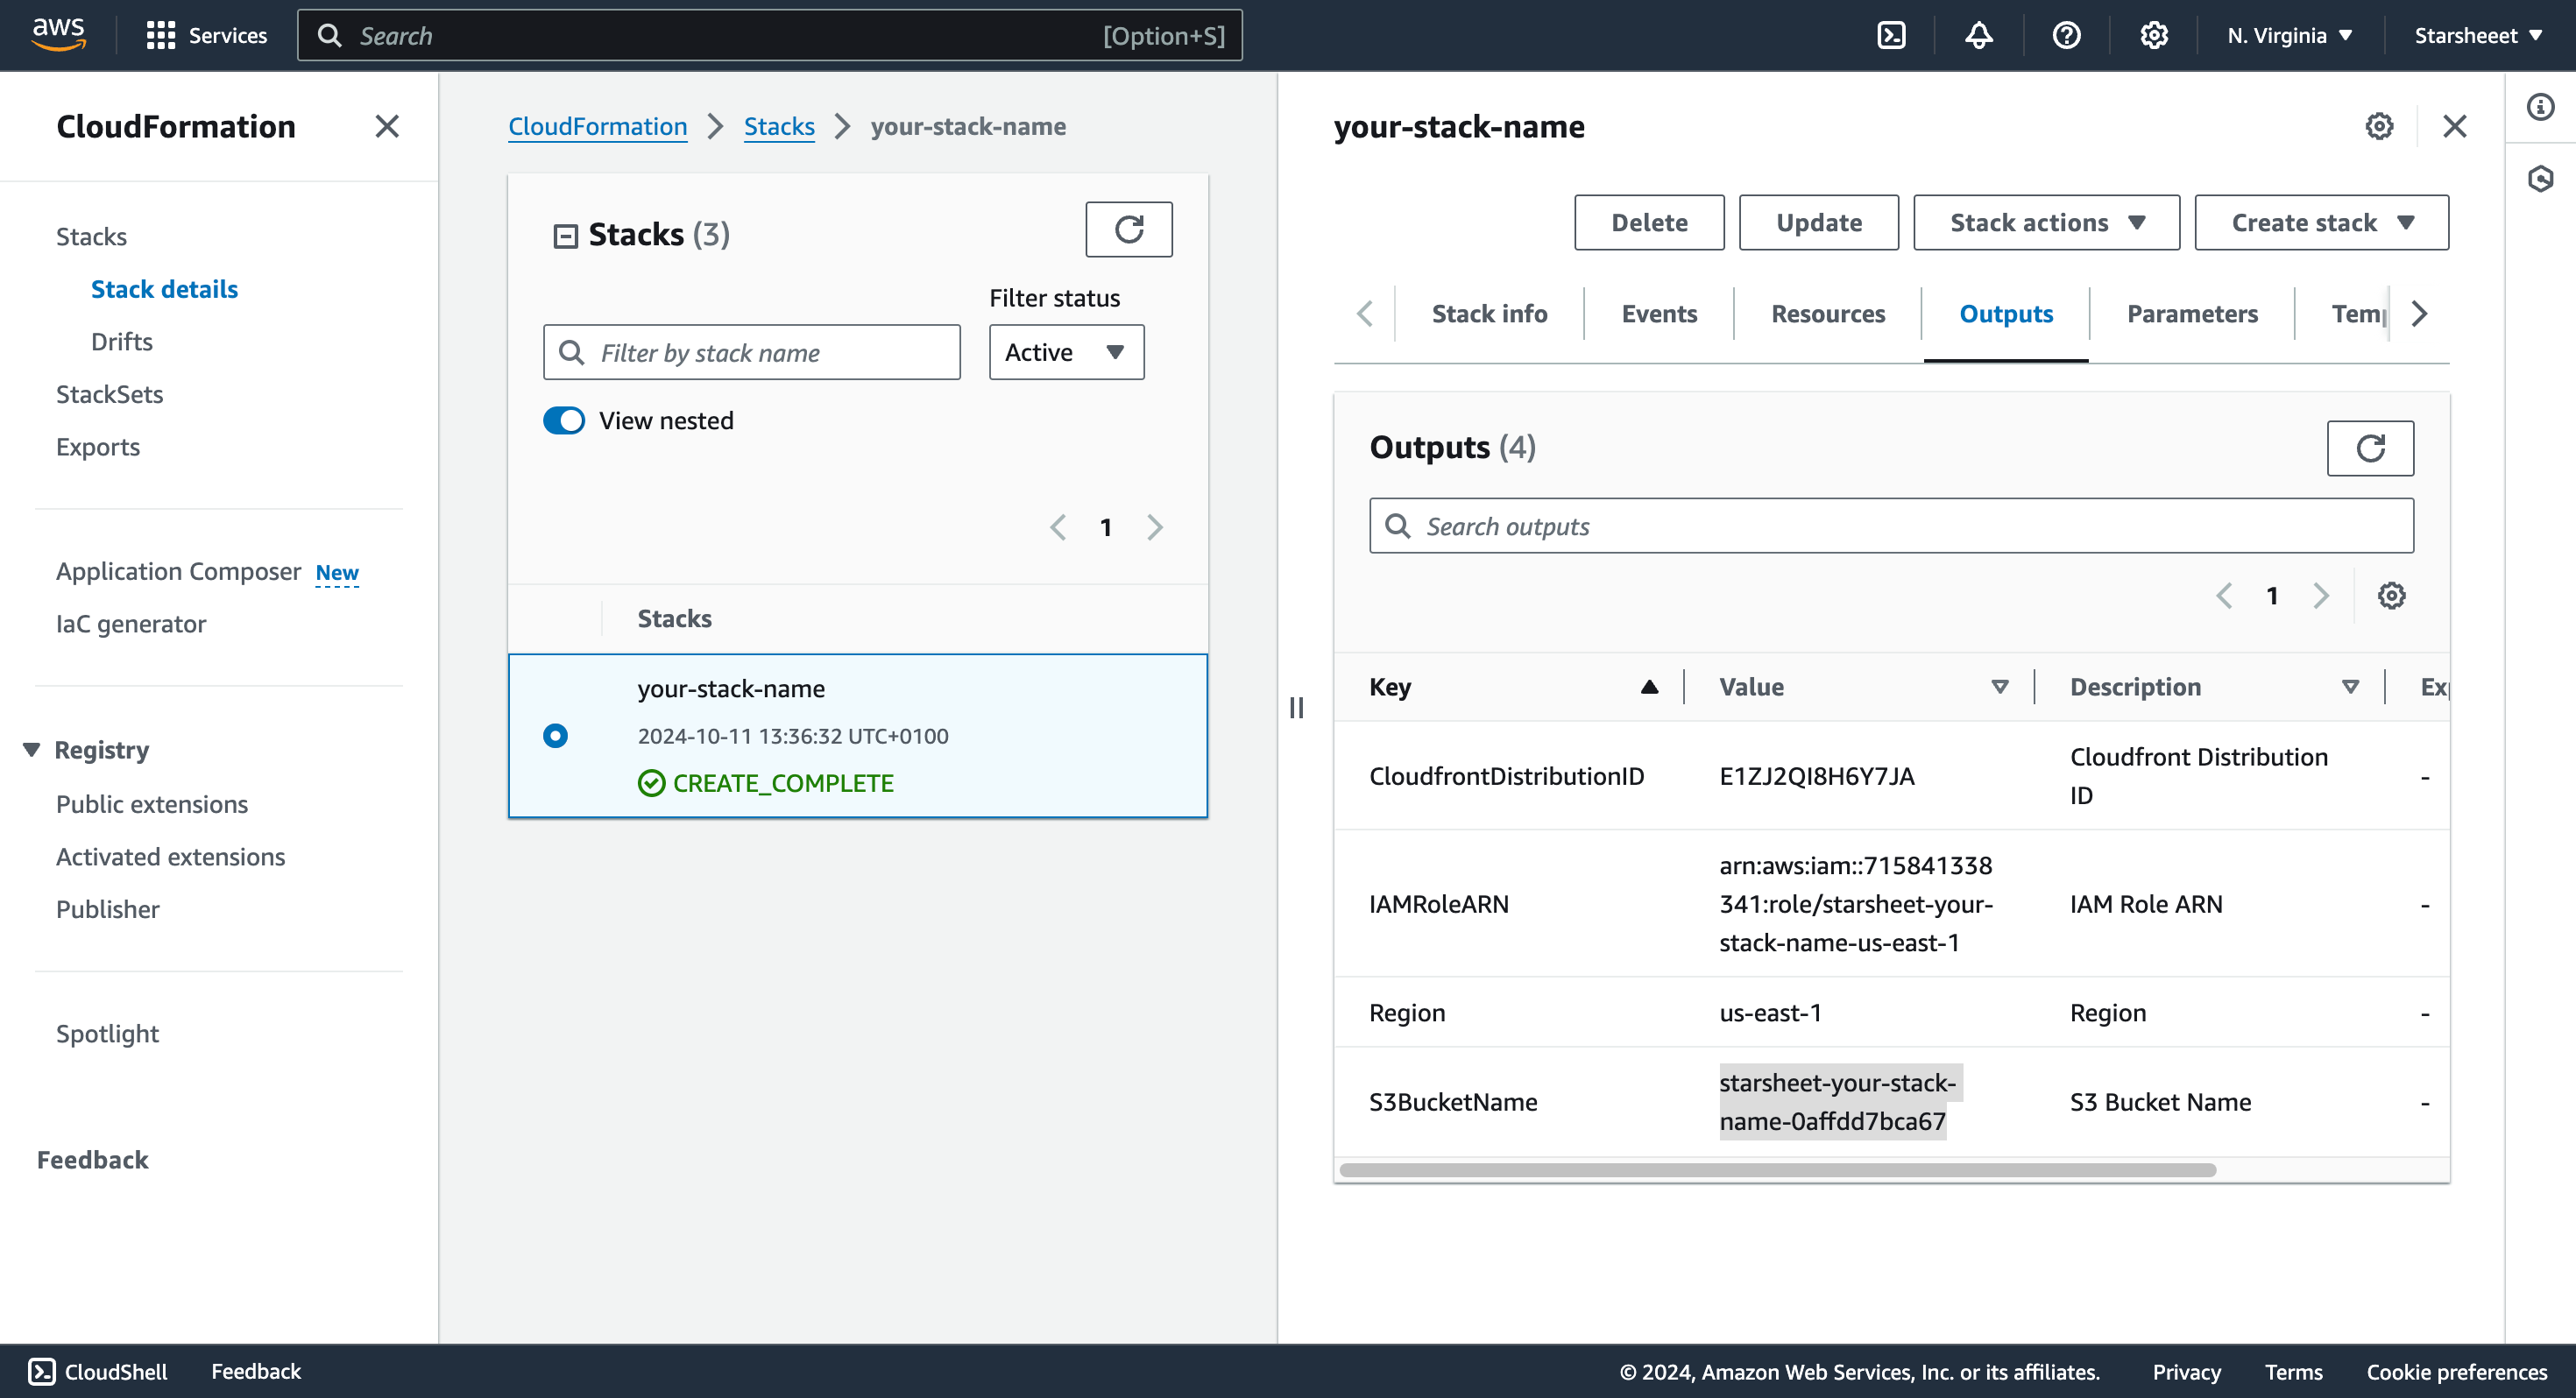
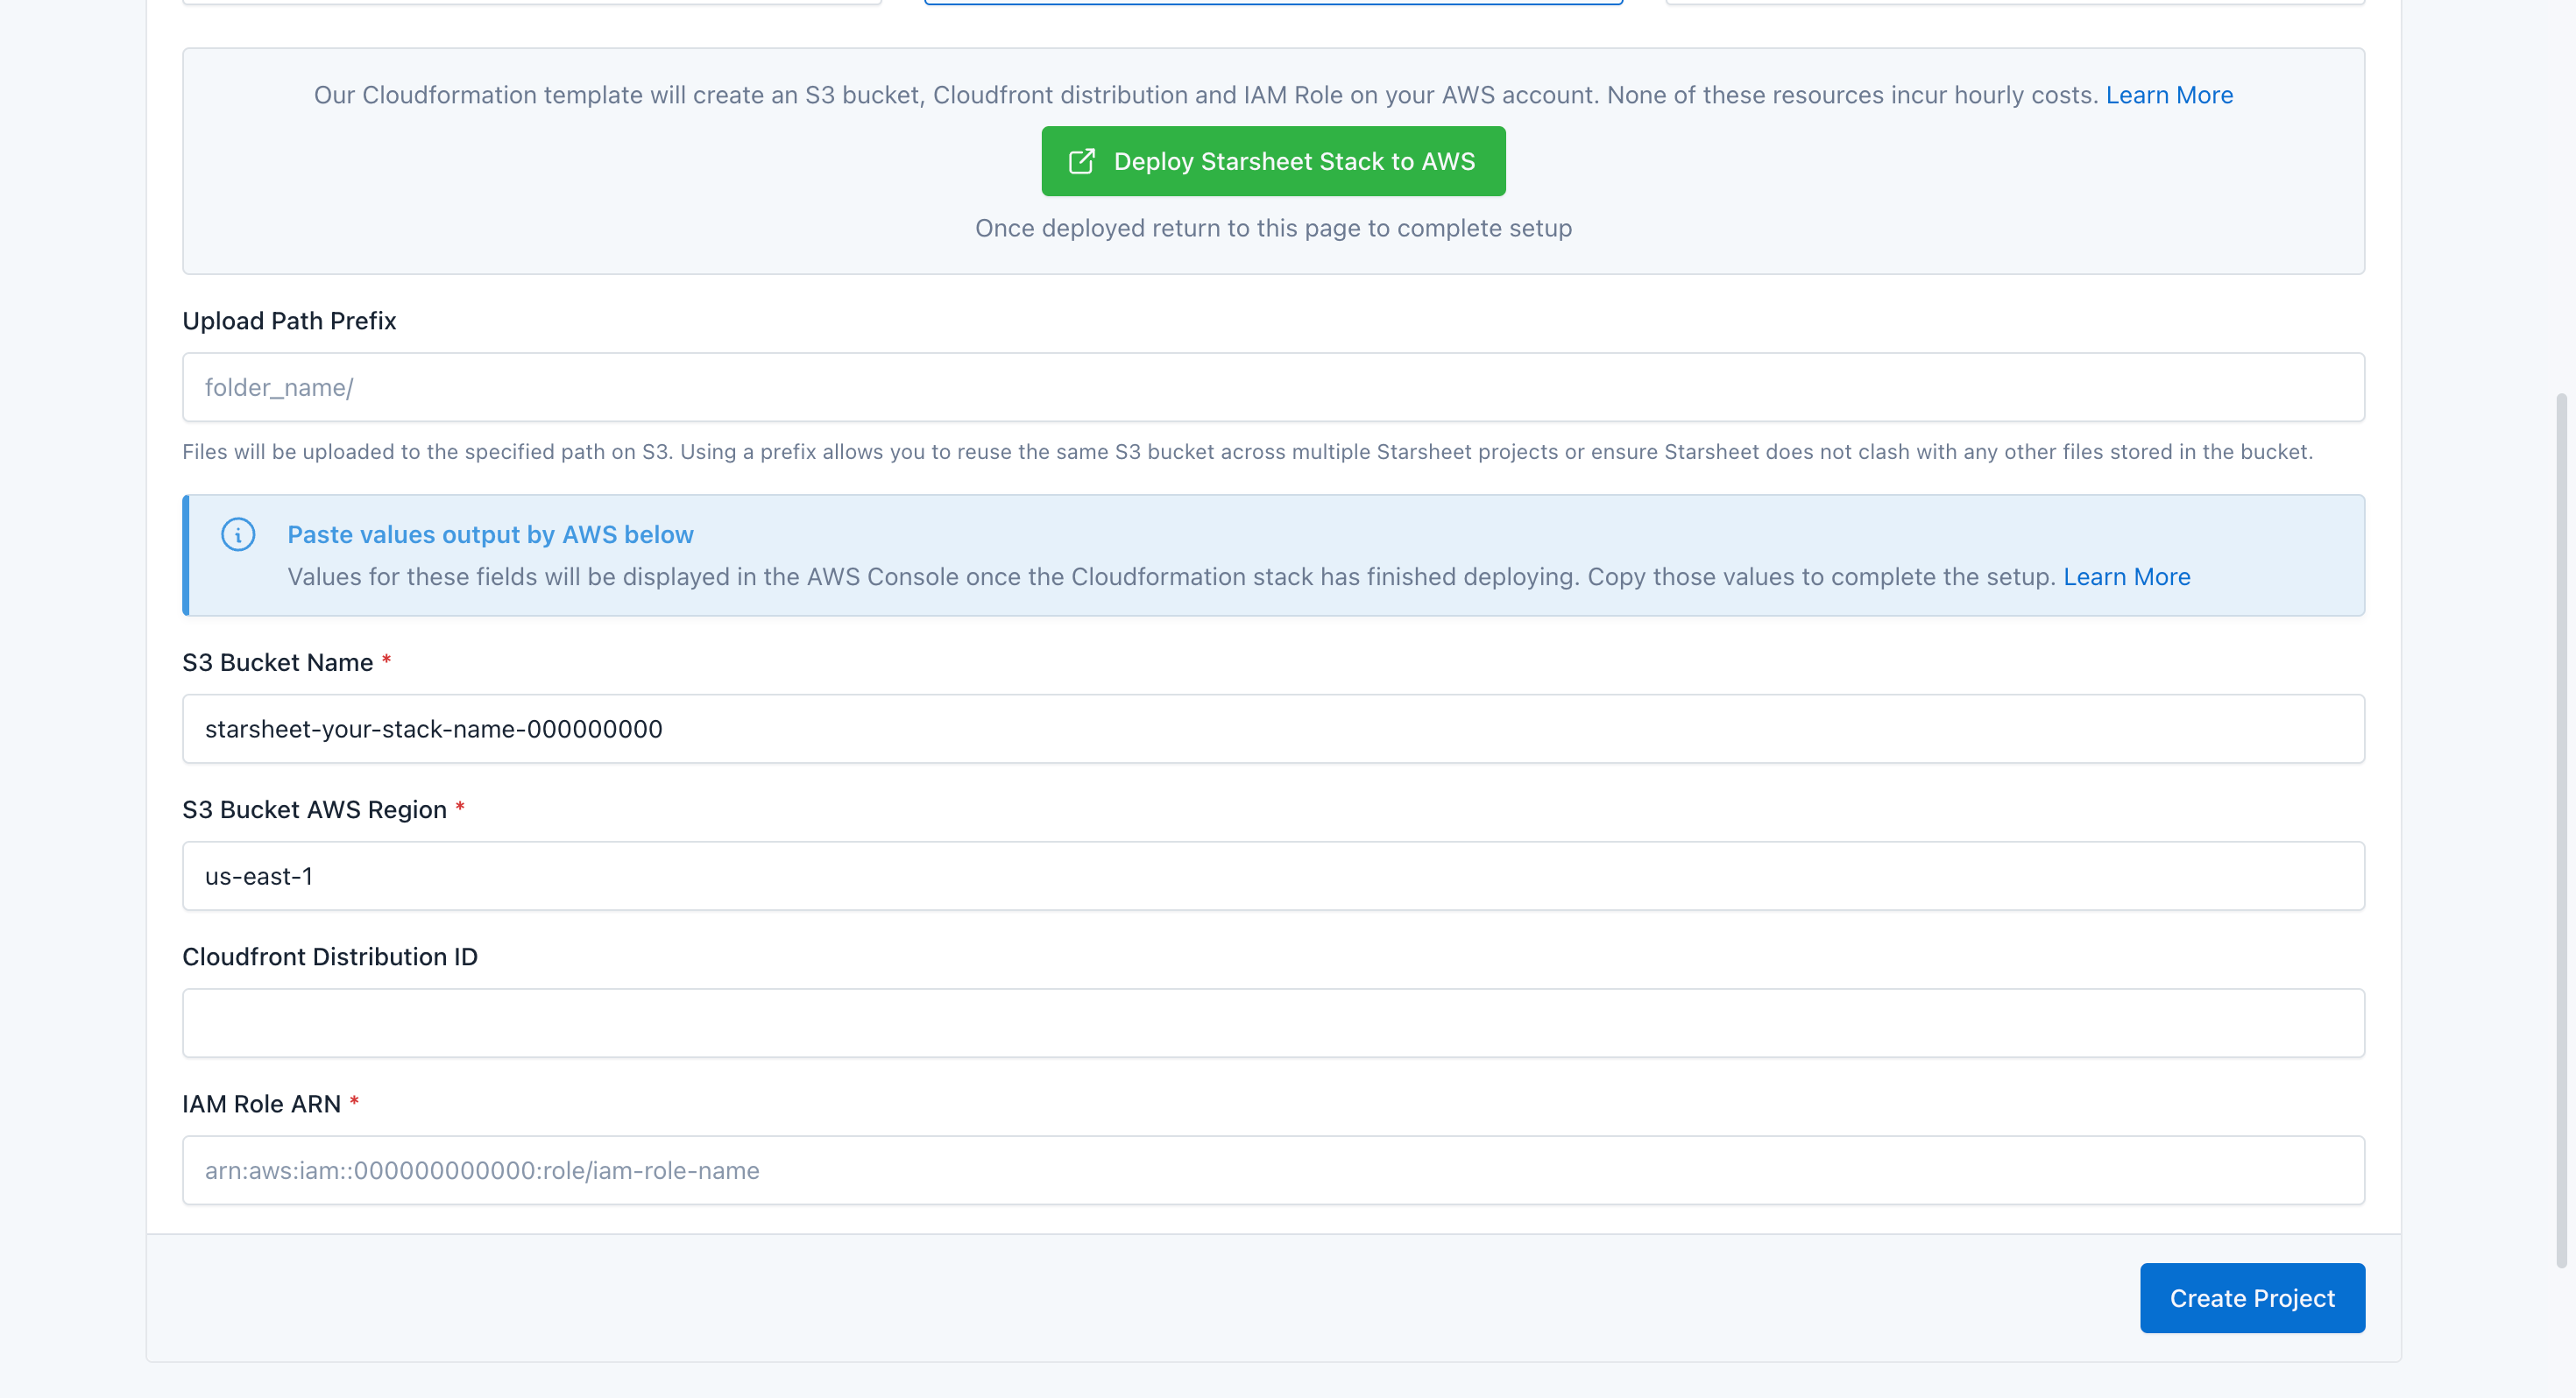 Once you have copied all 4 values. Click on the 'Create Project' button to finish the setup process.